
A slow WooCommerce store loses customers. Research consistently shows that customers abandon checkouts when pages take more than three seconds to load. If your store is slow, you are losing sales every single day it stays slow.
The good news is that most WooCommerce speed problems come from the same handful of causes. And most of them can be fixed without a developer, without touching code, and without spending a lot of money.
This guide walks through every fix in the order that matters. Start at the beginning and work through each step. By the end, your store should be significantly faster.
Table of Contents
Key Takeaways
- The most common cause of a slow WooCommerce store is the hosting plan, not anything inside the store itself.
- Caching plugins help, but they cannot fix a slow server. Fix hosting first.
- WooCommerce makes a server request on every page load by default, even on pages with no shopping happening. Turning this off is a quick win.
- A store with more than 20 active plugins is almost always slower than it needs to be.
- Images are usually the biggest contributor to page weight after hosting is resolved.
- Most speed fixes in this guide take under 30 minutes and cost nothing.
- If your store is still slow after completing this guide, the problem is likely hosting or a specific theme or plugin generating too many database queries.
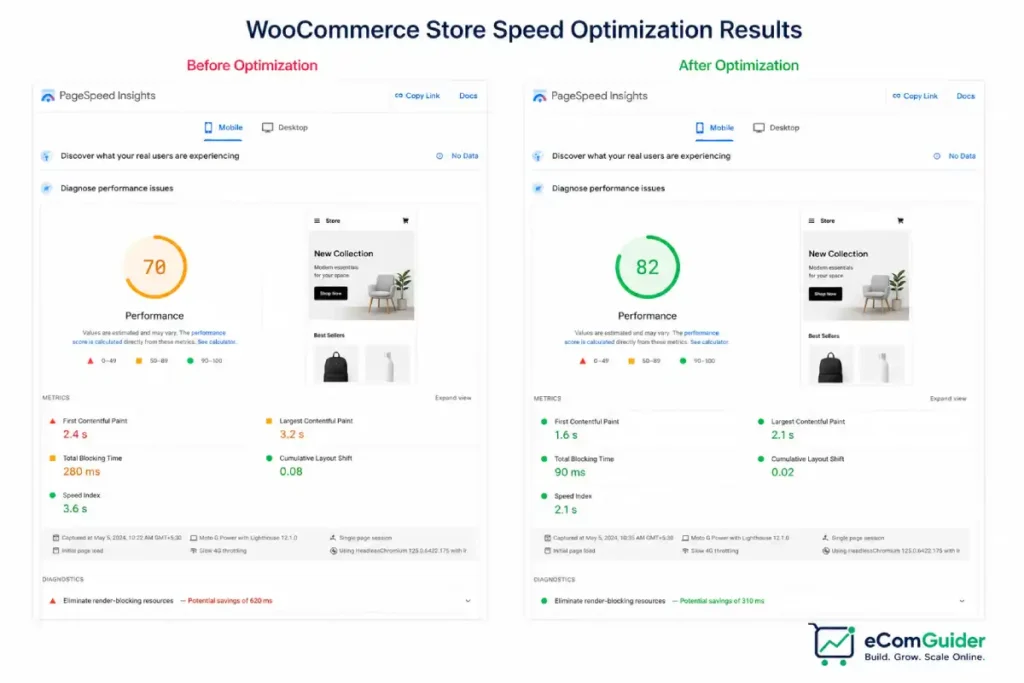
Step 1: Test Your WooCommerce Speed and Understand the Results
Before changing anything, you need to know exactly how slow your store is and why.
Run the Test
Go to Google PageSpeed Insights and type in your store’s web address. Click Analyze.
Run the test on three different pages:
- Your homepage (example: yourstore.com)
- One of your product pages
- Your checkout page (example: yourstore.com/checkout)
Write down the scores and times for each page. You need the before numbers so you know whether your changes are actually working.
What the Numbers Mean
You will see four measurements. Here is what each one means for your store:
| Measurement | What It Means | Good Score | Bad Score |
|---|---|---|---|
| Performance Score | Overall speed rating (0-100) | Above 70 | Below 50 |
| Largest Contentful Paint (LCP) | How long until the main content appears | Under 2.5 seconds | Over 4 seconds |
| Total Blocking Time (TBT) | JavaScript slowing down the page | Under 200ms | Over 600ms |
| Time to First Byte (TTFB) | How long the server takes to respond | Under 400ms | Over 800ms |
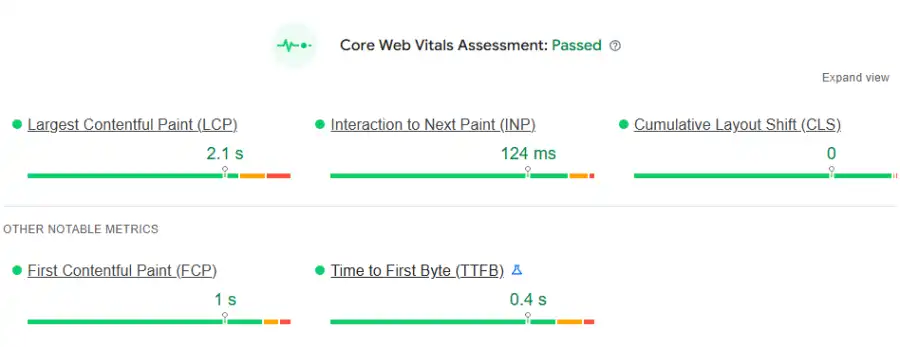
The most important number is Time to First Byte (TTFB). This tells you whether your problem is the hosting or something else.
Here is how to read it:
- TTFB under 400ms, Your hosting is fine. Your problem is plugins, images, or caching. Move to Fix 2.
- TTFB 400ms to 800ms, Your hosting is struggling. Fix hosting and also address everything else.
- TTFB above 800ms, Your hosting is the main problem. Fix this first before anything else.
How to Find Your TTFB
On the PageSpeed Insights results page, scroll down to the Diagnostics section. Look for Reduce initial server response time. The time shown next to it is your TTFB.
If you do not see it listed, it means your TTFB is already acceptable and you can focus on the other fixes.
Fix 1: Upgrade Your Hosting (The Biggest Impact)
If your TTFB is above 400ms, this is your most important fix. Everything else is secondary.
Why Hosting Affects Speed
Your hosting is the server that stores your website and sends it to visitors when they click. WooCommerce needs to run database queries for every page it loads.
On a shared hosting plan, your store shares a server with hundreds of other websites. When those websites are busy, your store slows down.
Think of it like a restaurant kitchen. Shared hosting is one chef trying to cook for 200 customers at the same time.
Managed WooCommerce hosting is a full kitchen team dedicated to your restaurant.
What Type of Hosting You Probably Have
Log in to your hosting account and look at the plan name. If it says anything like Starter, Basic, Shared, or Lite, you are on shared hosting.
If you pay less than $10 per month for hosting, you are almost certainly on shared hosting.
The Hosting Options and What They Cost
| Hosting Type | Example Hosts | Monthly Cost | TTFB You Can Expect | Good For |
|---|---|---|---|---|
| Shared Hosting | Hostinger Premium / Business | $3–10 | 600–1,500 ms | Small sites and new WooCommerce stores |
| Managed WordPress | Kinsta | $30–70 | 150–350 ms | Growing stores that want premium performance and support |
| High-Performance Managed WordPress | WP Engine | $25–100+ | 150–300 ms | High-traffic WooCommerce stores and businesses that need to scale |
| Cloud Hosting | Cloudways | $14–50+ | 100–300 ms | Stores that need more control and flexible server resources |
My recommendation for most store owners:
WP Engine: Best for high-traffic WooCommerce stores that need enterprise-grade scalability.
Hostinger: Best budget-friendly upgrade with excellent performance and value.
Kinsta: Best managed WordPress hosting for speed, reliability, and expert support.
It includes a staging environment, daily backups, and a speed cache built in.
If your store processes more than 100 orders per month, Nexcess or Pressable are worth the higher price. They are built specifically for WooCommerce and handle the performance configuration for you.
How to Switch Hosting Without Losing Anything
Switching hosting sounds scary. It does not have to be. These are the key steps.
The full migration guide covers each one in detail, including Stripe webhook updates, email configuration, and how to prevent lost orders during the DNS changeover:
- Sign up for your new hosting account. Do not cancel your old one yet.
- In your new hosting account, look for a migration option. Most managed hosts include free migration.
Hostinger offers free website migration, while Kinsta provides unlimited free managed WordPress migrations.
WP Engine includes an automated migration plugin, and its support team can assist with more complex migrations when needed. - If your new host does not offer migration, install a plugin called All-in-One WP Migration on your current store.
Export your full site. Import it into your new host. - Once the migrated site is set up, test it completely. Go through your checkout process with a test payment. Make sure everything works.
- When you are satisfied, update your domain’s name servers in your domain registrar account to point to the new host. Your hosting company will give you the new name server addresses.
- Wait 24-48 hours for the change to take effect around the world.
- Keep your old hosting active for one more month. Cancel it only after you confirm everything is working correctly on the new host.
Fix 2: Reduce the Number of Active Plugins
Every plugin you have installed and activated adds processing time to every page your store loads. The more plugins you run, the slower your store becomes.
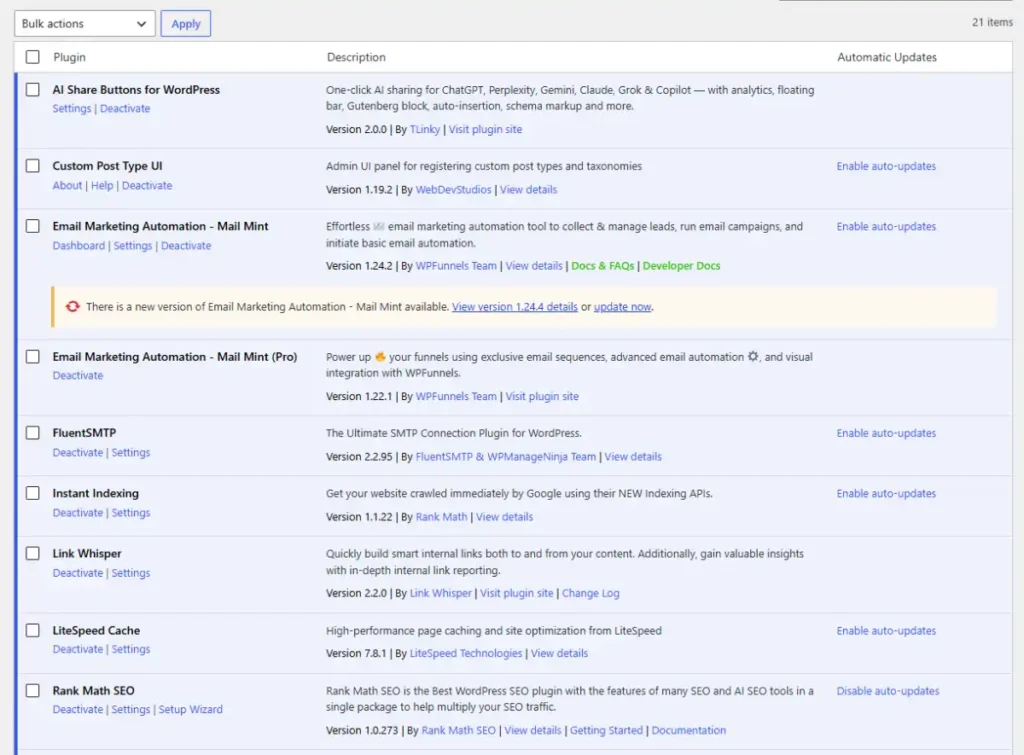
Most WooCommerce stores have too many plugins. I regularly see stores with 30 to 40 active plugins, half of which are either redundant, unused, or solving a problem that no longer exists.
Why This Matters
When a visitor loads your product page, WordPress runs every active plugin in sequence before the page is sent to the visitor’s browser.
If you have 30 plugins each adding 30 milliseconds of processing time, that is 900 milliseconds added to every page load before a single image has been downloaded.
Cutting your plugin count from 30 to 15 can reduce this overhead by half.
How to Find Which Plugins Are Slowing You Down
Install a free plugin called Query Monitor. After installing and activating it, visit your store’s homepage while logged in as an administrator.
You will see a new bar at the top of your screen with performance information.
Click on Queries in that bar. Query Monitor shows you how many database queries each plugin generates per page load. Any plugin generating more than 20-30 queries on a standard page is worth investigating.
When you are done investigating, deactivate Query Monitor. It adds its own small overhead while active.
The Plugin Audit: What to Remove
Go to Plugins in your WordPress admin and work through this checklist:
Remove these immediately:
- Any plugin you installed for a test and forgot about
- Any plugin for a promotion, sale, or event that has already ended
- Duplicate plugins doing the same job (two SEO plugins, two contact form plugins, two backup plugins)
- Any plugin with the note This plugin has not been tested with your current version of WordPress or last updated more than 2 years ago
Review these carefully:
- Page builders (Elementor, Divi, WPBakery), if you are not actively using them to build pages, they are adding overhead for nothing. Check whether any current pages on your site were built with them before deactivating.
- Social sharing plugins, most add external scripts from Facebook, Twitter, and Pinterest that load on every page
- FOMO or social proof popups, plugins that show who just purchased usually run JavaScript on every page and have minimal conversion impact for the performance cost
- Chat plugins, live chat widgets load external scripts and fonts on every page, even when no visitors are chatting
How to safely remove a plugin:
- Deactivate it first. Do not delete it yet.
- Visit your store and check that nothing is visibly broken on your homepage, a product page, and your checkout page.
- If everything looks fine after 24 hours, go back and delete the plugin completely.
- If something breaks, reactivate the plugin and find an alternative approach.
The Right Number of Plugins
There is no exact right number. A well-managed store with 15 focused plugins performs better than a bloated store with 30. The question for every plugin on your list is: is this plugin actively doing something useful for my store right now?
Fix 3: Enable HPOS (For Stores With Many Orders)
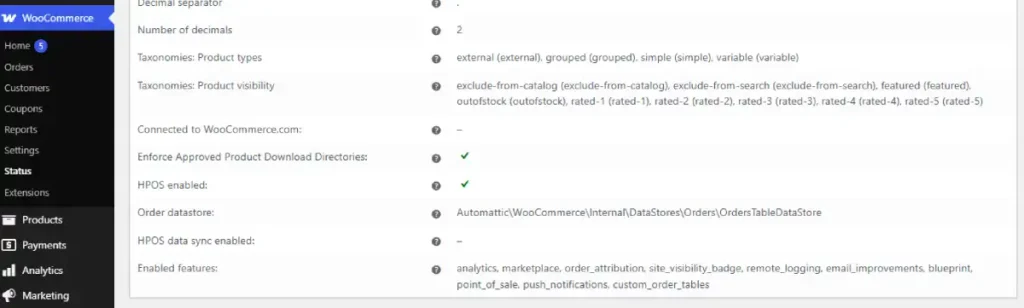
High-Performance Order Storage (HPOS) improves how WooCommerce stores and retrieves order data, making large stores faster and more scalable.
If you’re using the latest version of WooCommerce, HPOS is enabled by default for new stores, so you usually don’t need to do anything.
This section is mainly for older stores that were created before HPOS became the default.
If your store has been running for a while and contains thousands of orders, check that HPOS is enabled and complete the migration if needed. If your store is new, you can safely skip this step.
What Is HPOS?
HPOS stands for High Performance Order Storage. It is a change to how WooCommerce stores your order data in the database.
By default, older WooCommerce installs stored order data mixed in with all other WordPress content (blog posts, pages, etc.). As your store grows and you get thousands of orders, this mixed storage slows down how quickly WooCommerce can find and display order information.
HPOS moves all your order data into its own dedicated space in the database, separate from everything else. This makes order-related operations faster, especially in the admin area.
Do You Need It?
You benefit from HPOS if your store meets any of these conditions:
- You have more than 1,000 completed orders
- Your WooCommerce admin order list takes more than 2-3 seconds to load
- Searching for orders in the admin is slow
- You are on a new WooCommerce install (HPOS is already the default)
Before You Enable HPOS: Check Plugin Compatibility
This is important. Some plugins are not yet compatible with HPOS. If you enable HPOS with an incompatible plugin active, things will break.
Here is how to check:
- Go to WooCommerce in your WordPress admin
- Click Settings
- Click the Advanced tab
- Click Features
- Scroll down to the Order data storage section
- Look at the compatibility report below it
You will see a list of your plugins with one of three statuses:
- Compatible, Safe to enable HPOS
- Incompatible, Do not enable HPOS until this plugin has been updated
- Unknown, Check the plugin’s support page or contact the developer
If any plugin shows Incompatible, update it to the latest version and refresh the compatibility report. If it still shows incompatible after updating, contact the plugin developer and ask when HPOS support will be added.
Enabling HPOS Safely
Once all your plugins show Compatible or you have resolved the incompatible ones:
- In the same Features screen, find the Order data storage setting
- Change it to WooCommerce orders (recommended)
- Also tick the box that says Keep the posts table and the orders table synchronized
This synchronisation setting is important. It means WooCommerce will write orders to both the new system and the old system at the same time. This is slower temporarily, but it gives you a safety net.
- Click Save changes
- Leave synchronisation mode running for two full weeks
- During those two weeks, check that:
- New orders are appearing correctly in the admin
- Subscription renewals are processing (if you have subscriptions)
- Your accounting plugin is still syncing orders
- Any reports you use are showing correct data
- After two weeks with no problems, go back to Features and turn off the synchronisation option
You are now running on HPOS only.
Fix 4: Stop the Cart Loading on Every Page
This is a quick fix that makes a noticeable difference, and almost no one knows about it.
What Is Happening
Every time someone visits any page on your WooCommerce store, your homepage, a blog post, an About page, WooCommerce sends a background request to the server to update the cart count in the navigation menu.
This happens on every single page, for every single visitor, including people who have never added anything to their cart and never will on that visit.
This background request:
- Adds time to every page load
- Adds load to your server
- Sometimes prevents pages from being fully cached
The Simple Fix (No Code Required)
The easiest way to fix this is with a plugin called Disable Cart Fragments (free). Install it and activate it. That is it.
After installing, visit a product page on your store and check that your cart icon still works. In most cases it will work fine.
The cart count will update when a visitor actually visits the cart page rather than updating in real time on every page, which is an acceptable trade-off.
The Code Fix (If You Prefer Not to Add Another Plugin)
If you want to avoid adding another plugin, you can add this code instead. Go to your WordPress admin, then Appearance, then Theme File Editor, and open the functions.php file. Add this at the end:
add_action( 'wp_enqueue_scripts', function() {
    if ( ! is_cart() && ! is_checkout() ) {
        wp_dequeue_script( 'wc-cart-fragments' );
    }
}, 99 );
This tells WooCommerce to skip the cart background request on every page except the cart and checkout pages, where it is actually needed.
Important: Before editing functions.php, create a backup of your site. A mistake in this file can break your site. If you are not comfortable editing PHP files, use the plugin instead.
How to Check It Worked
After applying either fix, open your browser and visit a product page. Right-click anywhere on the page and choose Inspect or Inspect Element. Click on the Network tab. Reload the page.
In the Network tab, look for a request containing get_refreshed_fragments. If you do not see it, the fix is working.
Fix 5: Set Up Page Caching
Caching saves a copy of your pages so that when someone visits, the server sends them the saved copy instead of rebuilding the page from scratch every time. This dramatically reduces the time it takes to deliver pages to visitors.
What You Need to Know Before Installing a Caching Plugin
Do not run two caching plugins at the same time. If you have one installed already, remove it before adding another.
Check if your host already includes caching. SiteGround includes SuperCacher, Nexcess includes Advanced Caching, and Kinsta includes their own system. If your host includes caching, configure that before installing a plugin.
Some pages must never be cached. Your cart, checkout, and My Account pages must not be cached. If these pages are cached, customers will see each other’s cart contents and orders. Good caching plugins handle this automatically for WooCommerce, but always verify.
Recommended Caching Plugin: WP Rocket
WP Rocket ($59/year) is the most beginner-friendly caching plugin available. It detects WooCommerce automatically and configures the right settings without you needing to understand each option.
After installing WP Rocket:
- Go to Settings, then WP Rocket in your WordPress admin
- Under the Cache tab, confirm that User Cache is ticked if you have customer accounts on your store
- Under the File Optimization tab:
- Turn on Minify CSS files
- Turn on Minify JavaScript files
- Turn on Combine CSS files
- Leave Combine JavaScript files turned OFF, this breaks WooCommerce checkout on most themes
- Turn on Load JavaScript deferred
- Under the Media tab:
- Turn on Enable LazyLoad for images and iframes
- Under the Advanced Rules tab, check that your cart, checkout, and my-account pages are listed under Never Cache These Pages. WP Rocket adds them automatically, but verify.
After saving, go to your storefront and run through the checkout process completely to confirm it still works.
Free Alternative: LiteSpeed Cache
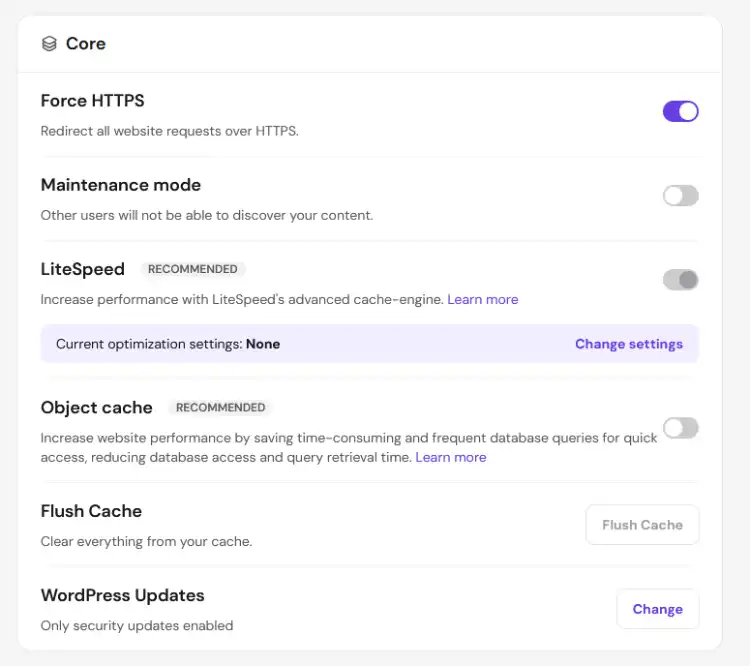
If you are on Hostinger or another host that uses LiteSpeed web servers, the LiteSpeed Cache plugin (free) is actually better than WP Rocket for your setup.
It integrates directly with the server rather than working around it.
Install it from the WordPress plugin directory, activate it, and follow the setup wizard. Enable WooCommerce-specific settings when the wizard asks.
Free Alternative: W3 Total Cache
If you are on a host that does not support LiteSpeed and you do not want to pay for WP Rocket, W3 Total Cache (free) is the next option.
It requires more configuration to work well and is not as beginner-friendly, but it is functional once set up.
Fix 6: Optimize Your Product Images
After fixing hosting and caching, images are usually the next biggest problem. Product images that are too large add weight to every page that displays them.
Why Images Slow Down WooCommerce
When a visitor opens a product page, their browser has to download every image on that page before they see the full page.
A single unoptimized product photo can be 3-8MB. A product page with six images at 5MB each is asking visitors to download 30MB before they can shop.
A well-optimized version of the same images might be 200KB each, making the total page weight under 2MB. The difference in load time is dramatic.
Three Changes That Make the Biggest Difference
Change 1: Convert your images to WebP format
WebP is a modern image format that is 25-35% smaller than JPEG while looking identical to the eye. Most browsers now support WebP.
Install Imagify (free up to 200 images per month). After installing:
- Go to Media in your WordPress admin, then Bulk Optimization
- Click Optimize all
- Imagify converts your existing images and automatically serves WebP to browsers that support it
For stores with a large image library, the one-time free credits may not cover everything. Imagify also offers low-cost credit packs.
The investment in converting your full image library is worth it.
Change 2: Stop uploading oversized images
WooCommerce displays product images at a maximum of 800-1200 pixels wide in most themes.
If you are uploading photos at 4,000 pixels wide from your camera or phone, the extra pixels are unnecessary weight.
Before uploading, resize your images to a maximum of 1,200 pixels wide. Free tools for this:
- On Mac: Preview app, Tools menu, Adjust Size
- On Windows: Paint app, Home tab, Resize
- Online: squoosh.app (also converts to WebP for free)
Change 3: Check that lazy loading is working
Lazy loading means images below the fold (images the visitor cannot see yet because they have not scrolled down) are not downloaded until the visitor scrolls toward them. This reduces the initial page load significantly.
WordPress enables lazy loading automatically since version 5.5. To check it is working on your store:
- Open a product page
- Right-click on a product image that is low on the page (below the fold)
- Choose Inspect or Inspect Element
- Look at the img tag in the code
- It should include
loading="lazy"in the code
If it does not, your theme may be disabling this. Add the following to your theme’s functions.php:
add_filter( 'wp_lazy_loading_enabled', '__return_true' );
Or use a caching plugin like WP Rocket, which enables lazy loading through its own settings.
Check Your Image Sizes in WooCommerce
WooCommerce generates multiple sizes of each product image. If these sizes are set too large, it creates unnecessarily heavy files.
- Go to WooCommerce, then Settings, then Products, then Display
- Check the sizes set for Main image width and Thumbnail width
- For most themes, a main image width of 800 pixels is more than sufficient
- If you change these sizes, you need to regenerate your existing thumbnails
To regenerate thumbnails after changing sizes, install Regenerate Thumbnails. Go to Tools, Regenerate Thumbnails, and click Regenerate All Thumbnails.
This may take a few minutes depending on how many images you have.
Fix 7: Clean Up Your Database
Over time, your database accumulates old data that it no longer needs. Expired temporary data, session records, old revisions of your pages, and leftover data from plugins you have deleted all add to the size of your database and can slow down queries.
The Easy Way: Use WP-Optimize
Install WP-Optimize (free). This plugin handles database cleanup through a simple interface without requiring any technical knowledge.
After installing:
- Go to WP-Optimize in your WordPress admin
- Under the Database tab, you will see a list of cleanup options
- Tick the following:
- Clean all post revisions
- Clean all auto-draft posts
- Clean all trashed posts
- Remove spam and trashed comments
- Remove expired transients
- Remove orphaned post meta data
- Optimize database tables
- Click Run all selected optimizations
This cleanup might take a few minutes on larger stores. You can set it to run automatically on a schedule (weekly is good for most stores) under the Settings tab in WP-Optimize.
What Is Being Cleaned and Why It Matters
Post revisions: Every time you edit a product description or page, WordPress saves a copy of the previous version. A page you have edited 50 times has 50 saved versions sitting in your database. Most stores can safely delete all but the last 3 revisions.
Expired transients: Temporary data that plugins store in the database as a shortcut. When this data expires, it sits in the database taking up space unless it is cleaned out.
Orphaned post meta: Leftover data from plugins you have deleted. When you remove a plugin, it often leaves its data behind in the database. This data does nothing but take up space.
Spam comments: Self-explanatory, but these accumulate quickly and add database weight.
For Technical Users: The SQL Way
If you have access to your database through phpMyAdmin (most hosting accounts include this), you can check how much autoload data you have.
Autoload data is loaded into memory on every single page request.
Run this query in phpMyAdmin:
SELECT SUM(LENGTH(option_value)) / 1024 / 1024 AS autoload_mb
FROM wp_options
WHERE autoload = 'yes';
If the result is over 2MB, you have significant autoload bloat. WP-Optimize’s optimization process helps reduce this, but a developer may be needed to identify and remove specific problematic entries.
Fix 8: Add a CDN
A CDN, or Content Delivery Network, is a network of servers around the world that stores copies of your static files: images, CSS, and JavaScript.
When someone visits your store, these files are sent from the server closest to them rather than from your single hosting server.
This makes a meaningful difference for customers who are geographically far from your server.
If your store is hosted in the US and a customer in Germany visits, a CDN means your images load from a server in Frankfurt rather than from Texas.
Setting Up Cloudflare (Free)
Cloudflare’s free plan is the most practical option for most WooCommerce store owners.
Here is how to set it up:
- Go to cloudflare.com and create a free account
- Click Add a site and type your domain name
- Select the Free plan
- Cloudflare will scan your DNS records and list them for you
- Check the list looks correct (all your existing settings should appear)
- Click Continue
- Cloudflare gives you two name server addresses (they look like erin.ns.cloudflare.com)
- Log in to wherever you bought your domain (GoDaddy, Namecheap, etc.)
- Find DNS settings or Nameservers for your domain
- Replace the existing name servers with the two Cloudflare addresses
- Save the changes
- Back in Cloudflare, click Done, check nameservers
Changes take up to 48 hours to take effect worldwide. Usually it happens within a few hours.
Important WooCommerce Settings in Cloudflare
After your domain is connected to Cloudflare, set up these rules to prevent problems:
Create Page Rules to bypass caching on cart and checkout pages:
- In Cloudflare, go to Rules, then Page Rules
- Create a new rule:
- URL pattern:
yourstore.com/cart* - Setting: Cache Level, Bypass
- URL pattern:
- Create another rule:
- URL pattern:
yourstore.com/checkout* - Setting: Cache Level, Bypass
- URL pattern:
- Create another rule:
- URL pattern:
yourstore.com/my-account* - Setting: Cache Level, Bypass
- URL pattern:
Without these rules, Cloudflare might cache your cart or checkout page, causing customers to see each other’s cart contents.
Test Rocket Loader carefully:
Cloudflare has a setting called Rocket Loader that speeds up JavaScript delivery. It is worth testing, but it sometimes breaks the WooCommerce checkout on some themes.
To test it:
- Enable Rocket Loader in Cloudflare’s Speed settings
- Visit your store and go through a complete checkout (even if just a test order)
- If everything works, leave it on
- If the checkout breaks or behaves strangely, turn it off
Fix 9: Check Your Theme
Your theme is the design layer of your WooCommerce store. Some themes are built with performance in mind.
Others load dozens of extra scripts and stylesheets on every page, regardless of whether those pages use the features those files support.
Signs Your Theme Is Causing Performance Problems
Run GTmetrix on your store and look at the Waterfall view. If you see many script files loading with your theme’s name in the URL, your theme may be loading more than it needs to.
Slow themes often show:
- More than 20 separate CSS files loading
- More than 15 separate JavaScript files loading
- External fonts loading from Google Fonts or other services on every page
What to Do
First, check if your theme has a performance settings section. Many premium themes include options to disable specific features or load certain scripts only on pages that use them.
If your theme does not have performance settings, or if you have a custom theme that a developer built, contact the theme developer and ask whether they have optimization recommendations.
If you are shopping for a new theme, look for:
- Themes described as lightweight or performance-focused
- Themes compatible with WooCommerce blocks
- Themes with fewer than 3-5 star ratings specifically mentioning slow performance in reviews
Lightweight theme recommendations that work well with WooCommerce: Astra, Kadence, GeneratePress, and Storefront (WooCommerce’s own free theme).
All of these are built with minimal scripts and load times in mind.
How to Test That Your Fixes Are Working
After each fix, run your PageSpeed Insights test again on the same pages you tested at the beginning. Compare the new numbers against your original baseline.
Do not expect to see a perfect score. A mobile score above 70 with an LCP under 2.5 seconds is a well-optimized WooCommerce store. Very high scores (above 90) are difficult to achieve with WooCommerce because the platform adds complexity that is unavoidable.
What you should see improve:
- TTFB drops after the hosting upgrade
- Total page weight drops after image optimization
- Number of HTTP requests drops after cart fragment fix and plugin reduction
- Overall performance score improves after caching
If your score is not improving, the GTmetrix Waterfall view shows exactly which files are taking the most time.
Look at the longest bars and identify which plugin, theme file, or image is causing the delay.
When to Hire a Developer
Some speed problems require code-level investigation. Here are the signs you need developer help:
- Your TTFB is under 400ms but your overall score is still below 50 after completing all the fixes above
- Query Monitor shows a specific plugin generating hundreds of database queries per page
- Your checkout page is significantly slower than your other pages without a clear reason
- You see errors in your browser console related to JavaScript conflicts
- A specific page is slow but others are fast
What to Ask a Developer to Fix
When hiring a developer for speed optimization, ask them specifically to:
- Run a Query Monitor audit and identify the top 3 plugins generating the most database queries
- Check your wp_options autoload data and clean up any orphaned plugin data
- Review your theme’s scripts and disable any loading on pages that do not need them
- Check for any custom code or functions that may be running inefficiently
A speed audit and basic fixes from a WordPress developer typically takes 2-4 hours and costs $150-400 depending on the developer.
Be specific about what you need and ask for a written report of what was found and what was changed.
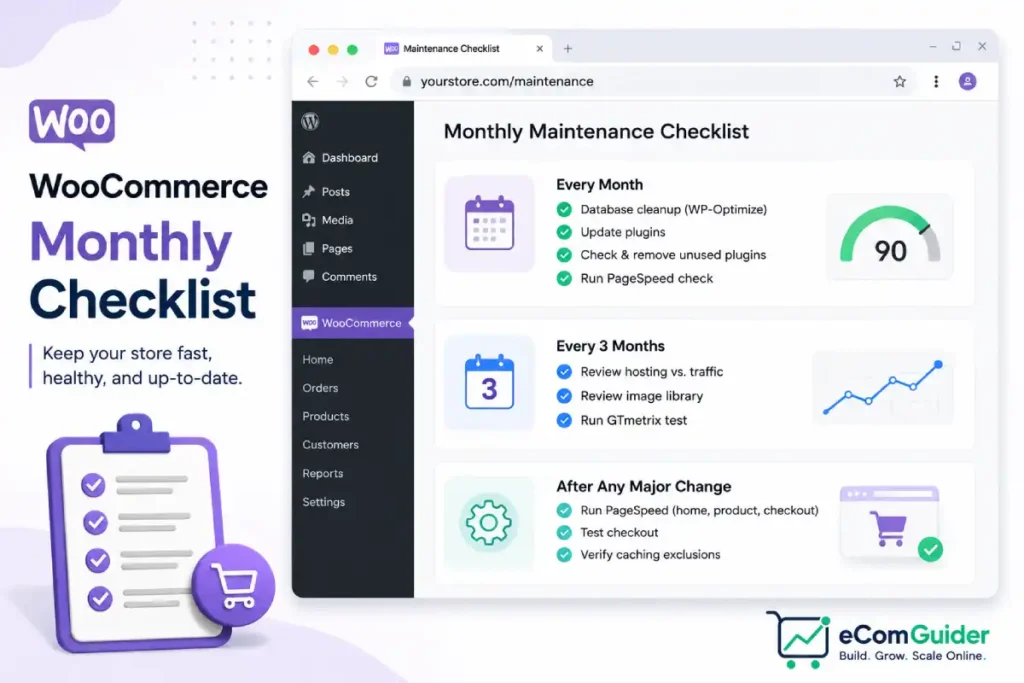
Monthly Maintenance Checklist
Speed is not a one-time fix. Keep your store fast with these monthly tasks:
Every month:
- Run WP-Optimize database cleanup (or check that the schedule is running automatically)
- Apply any pending plugin updates (always test on staging first if your host includes staging)
- Check your plugin list and remove anything no longer in use
- Run a quick PageSpeed check to confirm scores have not dropped
Every three months:
- Check your hosting plan against current traffic levels. If orders and traffic have grown significantly, consider whether an upgrade is needed.
- Review your image library. Upload new products with properly sized images.
- Run a full GTmetrix test and compare against your baseline from three months ago.
After any major change (new plugin, theme update, WooCommerce update):
- Run PageSpeed Insights on your homepage, a product page, and checkout
- Go through a test checkout to confirm the purchase process still works
- Check that your caching exclusions for cart and checkout are still in place
Summary: The Order of Fixes
If you are starting from scratch, work through the fixes in this order:
| Step | Fix | Time Required | Cost |
|---|---|---|---|
| 1 | Test and measure your current speed | 15 minutes | Free |
| 2 | Upgrade hosting if TTFB is above 400ms | 2-4 hours | $15-80/month |
| 3 | Audit and remove unnecessary plugins | 30-60 minutes | Free |
| 4 | Enable HPOS (stores with 1,000+ orders) | 30 minutes | Free |
| 5 | Disable cart fragments on non-cart pages | 5-10 minutes | Free |
| 6 | Install and configure caching plugin | 30 minutes | Free-$59/year |
| 7 | Optimize and compress images | 30-60 minutes | Free-$10 |
| 8 | Clean your database | 15 minutes | Free |
| 9 | Add Cloudflare CDN | 30-60 minutes | Free |
| 10 | Check your theme’s performance | 15-30 minutes | Free |
For most stores, steps 1 through 6 produce the majority of the improvement. Steps 7 through 10 are important but build on a foundation that steps 1 through 6 create.
Start testing. Work through the list. Your store will be faster. The WooCommerce platform works well when configured correctly, performance issues are almost always a configuration problem, not a limitation of WooCommerce itself.
If at any point during this process you are considering whether WooCommerce is the right platform for your store’s needs, Shopify handles hosting, updates, and performance infrastructure automatically.
The trade-off is a monthly fee and less flexibility. Whether that trade-off makes sense depends on what your store needs. Your running costs across both platforms are worth comparing before making any switch.
FAQ’s
Why is my WooCommerce store so slow?
Hosting is the most common cause. Shared plans at $3-10/month cannot handle WooCommerce’s database load under real traffic. If your TTFB is above 400ms, moving to managed WooCommerce hosting makes more difference than all other fixes combined.
How do I check my WooCommerce store’s speed?
Run your store URL through Google PageSpeed Insights. The Time to First Byte (TTFB) in the Diagnostics section tells you whether your problem is hosting or something else. Test your homepage, a product page, and checkout separately.
Can I fix WooCommerce speed without a developer?
Yes, for most problems. Hosting upgrades, plugin reduction, caching, and image optimization are all manageable without code. The cart fragment fix in this guide has a free plugin alternative if you want to avoid editing PHP.
What is the fastest way to speed up WooCommerce?
Check your TTFB first. Above 600ms means hosting is the bottleneck and a server upgrade fixes it faster than anything else. Under 400ms means caching and image optimization will have the most impact.
Will a caching plugin fix my slow WooCommerce store?
Not if hosting is the problem. Caching reduces load on a server but cannot fix a server that is too slow to respond. Fix hosting first, then add caching to amplify the improvement.
How many plugins is too many for WooCommerce?
Stores with more than 20 active plugins consistently perform worse than leaner ones. The better question is whether each plugin is actively solving a problem your store has right now. Remove anything that is not.
Is Cloudflare safe to use with WooCommerce?
Yes. Set Page Rules to bypass caching on your cart, checkout, and My Account pages first. Test Rocket Loader on your checkout before leaving it active — it occasionally breaks WooCommerce checkout scripts on some themes.
How long does it take to speed up a WooCommerce store?
Most fixes take an afternoon. The hosting upgrade adds 24-48 hours of DNS propagation waiting time, but the actual work is 2-3 hours. Set a day aside, work through the steps in order, and retest 48 hours after the hosting change.
Work through these fixes in order and your store will be faster. The WooCommerce platform handles these problems well when configured correctly. Most speed issues are setup problems, not platform limitations.